So I had some left over apples, and I decided to make a fall favorite in my house.
Apple Butter.
It so easy to make. My daughter often helps me out :-) Just grab your Crock Pot and some apples and you are good to go.
I have a friend in Texas who is diabetic, so I made this batch sugar free to send him some. You honestly can not taste the difference between the sugar and sugar free version. Most people don't even know it's sugar free unless you tell them, even then they usually don't believe you.
When making apple butter many people will tell you that you have to use a specific type of apple. You can really use whatever you have available. This time of year usually you can find every type of apple at the store. Whenever I make apple butter I try to use the sweeter apples rather then the sour. If you start with sweeter apples, then you won't have to add as much sugar. You can use sour apples, but it will have a different taste and you'll have to add more sugar.
I use either one type or a combination of Fuji, Honey crisp, Gala, Red Delicous, and Macintosh.
This batch is made with Macintosh Apples.
Here's what you'll need:

12 pounds of apples, No sugar added apple juice, Cinnamon, Cloves, Nutmeg, Splenda (or sugar), and Splenda Brown Sugar (or regular Brown Sugar).

First I grab a big measuring cup. I like a 4 cup one because you can add everything to one bowl and have less dishes. You'll want to add about 1 cup of brown sugar to your cup first. I do it first because you have to pack it down, and it's hard to do if you add the splenda or sugar first.

Then add about 1 cup of Splenda to that. If you don't want it as sweet you can use less sugar or splenda.

To the same cup I add 1 T of Cinnamon

1 t of ground Cloves

and 1 t of nutmeg.

Use a spoon and mix everything up. Make sure to get the brown sugar off of the bottom and mixed in thru-out, then set it aside. You'll be layering the splenda/sugar mixture in your crock pot alternating from apples to splenda/sugar.

Set all of your apple in your clean sink basin full of cold water to wash them :)
Coring apples can be kind of a pain. I've tried those sun shaped apple corer slicer do-dads that are supposed to be so easy and time saving. They aren't. Often times you end up spending more time trying to line it up, only to have the center be off and you have to cut out the seeds by hand.
These are the steps I've found that make coring apples so much easier.

First you'll want to cut off one big chunk of the side. Make sure that you get as close to the core as possible without actually cutting into the seeds. Sometimes you'll get the seeds in there, its ok, just pick them out.

Do the same to the otherside.

You'll want to cut the smaller sides off the same way as the first big chunks.

Then cut the last time off. With enough practice, you'll be able to do this rather quickly. Much more quickly then those silly sun apple corer slicers.

You can see that I've cut close to the seed, but not actually close enough that the seeds fall out, or are cut. This just takes practice. Don't get discouraged if this isn't easy at first. I've done a lot of apples in my time. So I've got my technique down.

When you get ready to put them in your crock pot yo'll want to set the apple on its flat side down on your cutting board. Then slice into smaller slices length wise.

Then turn then and cut them into smaller little chunks. The smaller the pieces, the more you'll be able to fit in the crock pot. But don't make them super teeny tiny, and they don't have to be all uniform.

Scoop them up using you knife and hand.

Then add them to you'r crock pot. This is the point where I turn it on to its High setting.

When the bottom is filled with apples so you cannot see the bottom...

You'll want to grab your splenda/sugar mixture and use your spoon to sprinkle some over the top of the apples.

Then, you'll add more apples.

I add apples until I cannot see the splenda mixture.

Then add another layer of the splenda/sugar mixture.

Then add another layer of apples.

Then another layer of the splenda/sugar mixture.

Then another layer of apples.

and yes.... another layer of the splenda/sugar mixture.

and yes.... another layer of Apples.

and Yes again.... another layer of the Splenda/sugar mixture.

Then the second to last layer of apples.

At this point your apples will be kinda full in your crock pot. Add the rest of the splenda/sugar mixture to this layer of apples. It will either be a lot, or hardly any at all. You want to add this before your last layer of apples. The reason you put this on now instead of after the last layer of apples, is the lid. The Splenda/sugar mixture will stick to the lid more then the apples.

So you'll put your last layer of apples on top of the splenda/sugar mixture. You're also going to add about 2 cups of apple juice over the top. Pour it in slowly and make sure you pour some over most of the apples. This will collect some of the splenda and spices at the bottom of the crock pot, and help to cook the apples. You can use water if you prefer it. The apple juice just adds a little sweetness without sugar, and another layer of flavor.

Put your lid on top of your apples. As the apples cook the lid will slowly fall down to the rim of the crock pot. You can have your lid be a little higher, but just keep in mind if you fill it too full, it could boil over the sides.

You should have already turned your crock pot on high while you were cutting up your apples. Once you put the lid on you'll want to set your timer for 1 hour.

This is what your apples might look like after the first hour. Sometimes they don't look like they have cooked very much. Thats ok. I usually don't stir the apples until the morning.
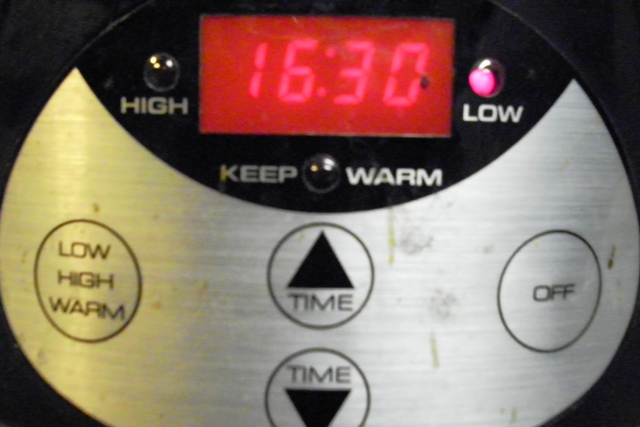
When that hour is up, you'll want to set your crock pot to low, for 15-16 1/2 hours. I usually set it for longer, because if it's done early, great! But if it needs to cook for longer, you'll have your time already set and ready to go.
Usually I'll cut up the apples before I go to bed. That way when you wake up in the morning your house will smell amazing!

This is what it will look like when you wake up in the morning. You can see that the apples have cooked down, and started to turn brown around the edges. At this point I stir it around and make sure it's all mixed up.

This is at about 15 hours. You can see it's cooked down a little more and also is a little browner.
At this point I let it cook with the lid off for about 30 min. This will let some of the liquid cook off. If you have more liquid you will need to cook it a little longer, and if its a little thick then I wouldnt cook it any longer.

Once I let it cook a little longer, I get out my emulsifying blender. You can ladle all of this into a food processor, or blender, but this is the easiest way I've found to blend it all. Plus less dishes.

When it looks about like this you're ready to get your jars out.

If it is too runny you can cook it a little longer, just put the lid back on but leave it cracked a little. It will start to splatter if you leave the lid off.

Ladle them into your sterile jars. I ended up getting about 13 half pint jars from this batch.

Put them in your boiling water canner and process for 10 minutes.
When it's all done enjoy with Biscuts or Toast. I personally just eat it with a spoon right out of the jar. ^u^


